In past articles, I’ve talked about preparing for a painting by using reference photographs. This process involves taking numerous photographs and selecting certain elements from each picture and creating a whole new painting from the mosaic of elements.
However, it is very good practice for the beginning artist to create a painting from a single photograph. As a student, you need to practice your skills with paint and brush and leave all the other stuff for later. So today I’m going to talk about how you can take an ordinary photograph and turn it into the subject for a really great painting.
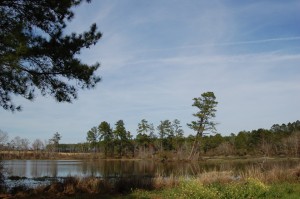
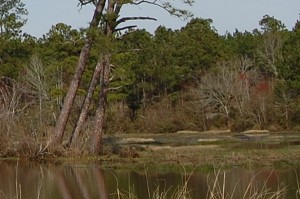
Since I’m primarily a waterfowl artist, the large majority of my reference photographs are scenes that involve water. For this article, I’m going to be working with a shot I took of an old mill pond near my home. As you can see in the photograph below, there is not really much interesting going on.
Notice how the scene lacks any compositional qualitites. It’s really just a picture that would hardly make a very interesting painting. But let’s do some cropping on the image and see what we come up with.
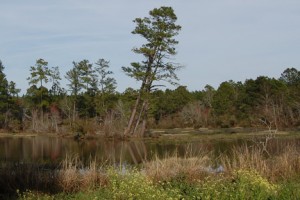
Now that I’ve cropped the image, I have a nice looking foreground of the grass, we have some tall trees, and some water. The problem with this image is that it does not look pleasing to the eye with the tall trees in the center of the image.
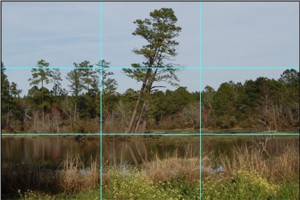
If we divide the image into three equal segments, both horizontally and vertically, we find that the upper edge of the water falls on one of the guide lines but the trees don’t fall on any of the dividing lines. When major objects do fall on the 1/3 dividing lines, this is known as the Rule of Thirds. When images follow this rule, they are more pleasing to the eye than those that don’t.
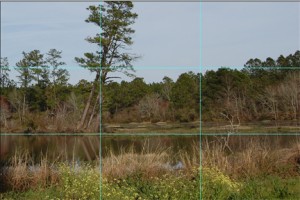
Let’s shift the scene around so the tall trees fall on the left guide line. Now we get something that looks more like a painting. This scene places the two major objects, the tall trees, and the water line below the trees, not only on the guide line, but at the intersection of two of the guides. We also have an interesting forground to work with.
We could even zoom in closer and place more attention on the tall trees. With this image, the foreground has been almost eliminated from the scene and more emphasis has been placed on the large trees to the left. Notice now how your eye is immediately drawn to the large trees. The fact that the trees continue above the top of the image gives the scene a sense of continuation. This type of effect draws the viewer into the picture and makes them wonder what is outside the image. If I painted some ducks in this scene, it would make for a very nice painting.
 All of the scene manipulations in this article were done using Photoshop to crop and scale the image. With this tool at my disposal, the possibilities for subject material to paint are endless. So take a look at some of your photos and see what you can come up with for your next painting.
Until next time, keep your brushes clean, your colors pure, and as always, thanks for stopping by.

