In this post, I’m going to teach you how to paint a mallard duck wing, using a quick and easy to master method. Today, I’ll only be giving you instructions for painting the underside of a mallard duck wing, but in a later post, I’ll show you how to paint the top side of the wing.
The underside of a mallard duck wing is made up of a series of small feathers that cover the main flight feathers and the secondary feathers of the upper side of the wing. I have created a method of painting these feather groups that greatly simplifies the process and looks realistic without having to paint each individual feather. The method involves some simple brush strokes that you’ll learn quickly with a little practice.
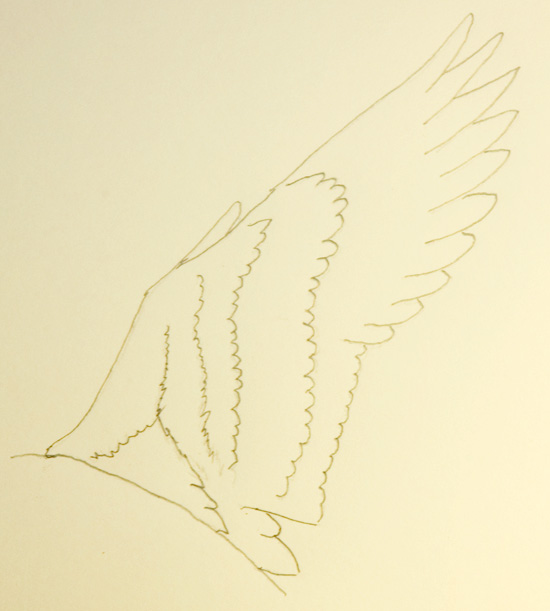
Mallard duck wing sketch
We’ll start out with the sketch of the wing as viewed from the underside. You’ll notice in the sketch that I’ve simply outlined the feather groupings that I want to paint and not the individual feathers. As you can see, there are essentially 5 feather groups we will be dealing with on this malard duck wing.
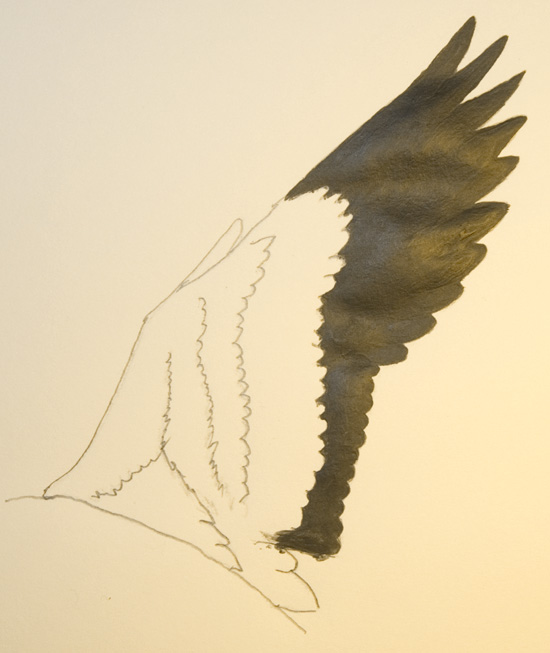
Flight feathers of the wing painted with the dark value
The first thing I do to begin painting the wing is mix a dark value of grey, which consist of a 1 to 1 mix of titanium white and ivory black. I then paint the entire flight-feather group with this dark value. I’m painting on lightweight paper for this exercise so you’ll notice some wrinkles and reflections in the photographs.
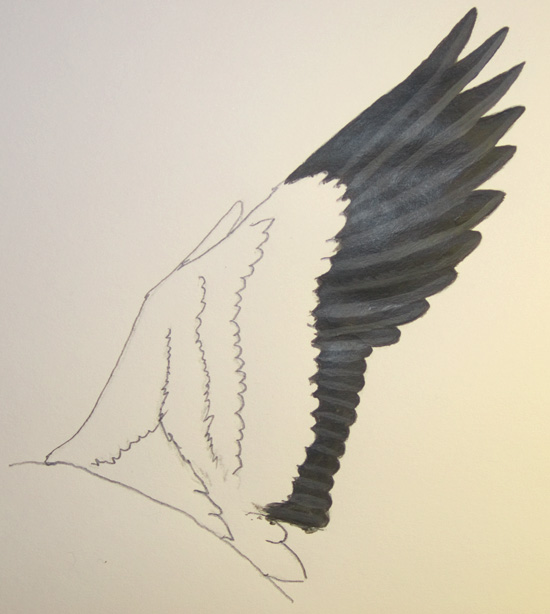
Flight feathers of the wing highlighted
After the dark value on the flight feathers has dried, I add a little titanium white to the dark value and create a mix that is slightly lighter in value. Using a flat brush about 1/8″ wide, start at the top of the wing and highlight the bottom edge of each feather in the group.
You’ll have to pay close attention to your reference photos to get the direction of the highlighting correct so the feather will look realistic.
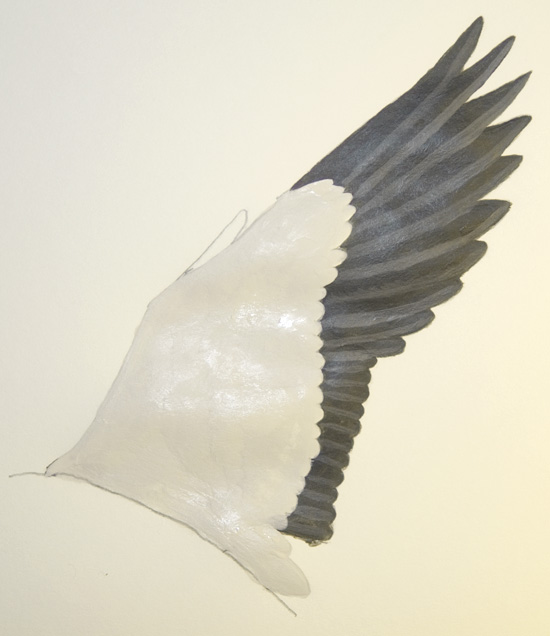
The entire area containing the coverlet feathers painted light grey
The next step in this process involves mixing a small amout of ivory black with a good amount of titanium white to get a very light grey color. Be very careful not to get this color too dark because this feather group is actually white and we want the shading effect to be very light.
I always paint all of the white groups with this grey color all at once to save time. However, until you’ve had some practice with this technique, you may want to paint each feather group individually by stopping at the boundary between groups.
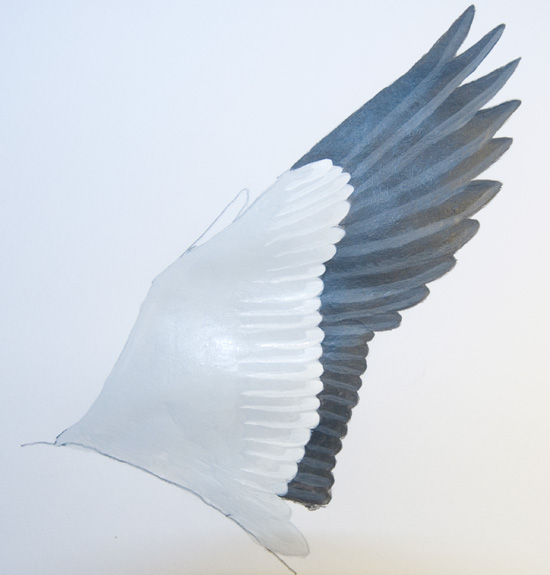
The wing with the first group of feathers highlighted
To begin highlighting each feather in this particular group, take pure titanium white and mix enough water to give the mix a consistency that is similar to half-and-half whipping cream. You want the paint to flow easily from the brush but not too thin.
Dip a flat 1/8″ sable brush in this mixture and then wipe some of the excess paint onto a clean spot on your palette. Now take the brush and start at the top of the wing and create a backward j shape that highlights the tip end and the bottom edge of each feather in this group.
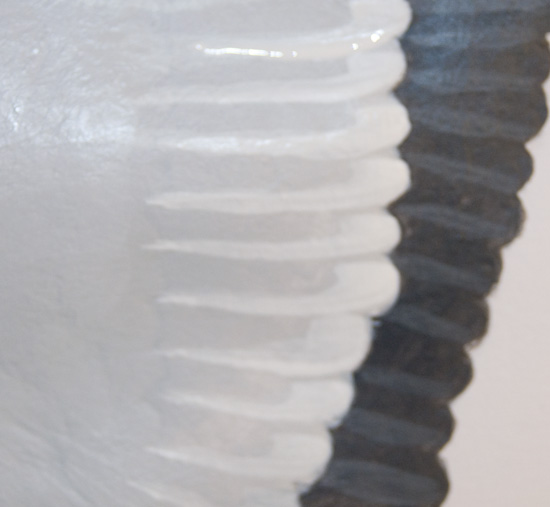
Enlargement showing the first group of coverlet feathers highlighted
This image better illustrates the effect you’re trying to achieve. When creating this effect, leave a small space between each feather to give the illusuion of a shadow at the top of each feather.
You do this by starting the highlight effect just below the bottom edge of the feather above the one you are highlighting. You want to create this effect with a single brush stroke.
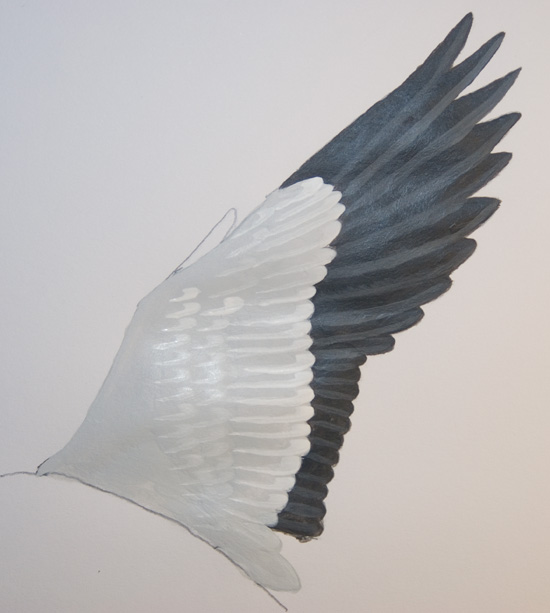
The wing with the 2nd and 3rd coverlet group highlighted
Now highlight the second and third feather group using the same brush stroke you used in the first group. The difference here is the feathers in these groups are shorter than the feathers in the first group.
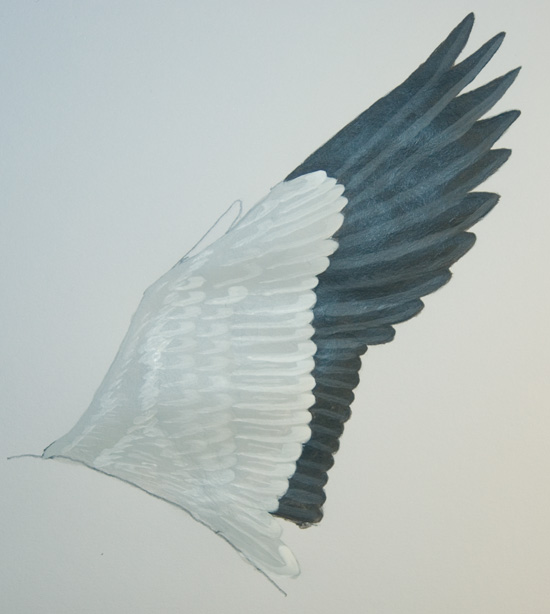
All of the wing coverlets highlighted
Now highlight the last feather group. This time we want to make very tiny brush stokes because the feathers in this group are very narrow. Highlight the two large feathers at the bottom of the wing near the body and you’re done with these feather groups.
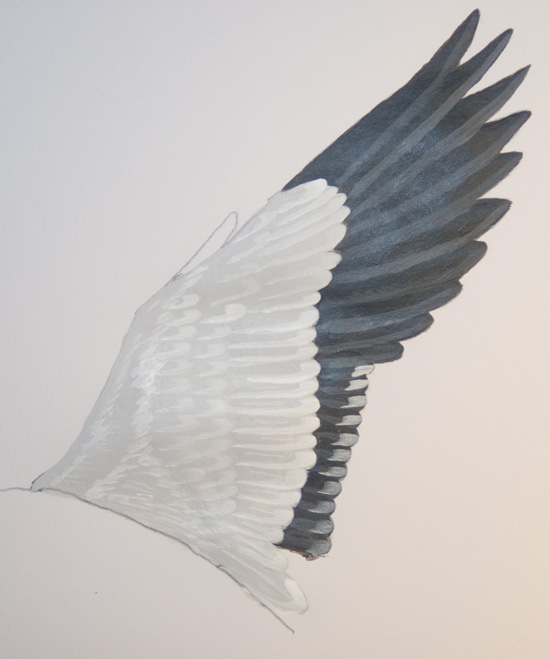
The mallard duck wing with the secondard flight feather tips painted white.
Now, using the same grey color you used as the dark value of the white feathers, highlight the ends of the secondary flight feathers. The tips of these feathers are actually white but are usually in shadow, so they will appear grey.
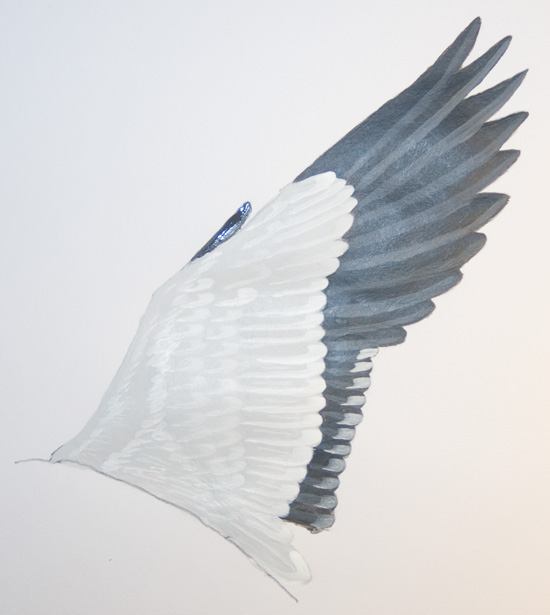
Image of the finished wing
Now paint in the single dark feather at the top of the wing and you’re done. To really make the wing look realistic, I usually go into the flight feathers, using my sky color, and paint in some separations in the barbs of the feathers.
I like to add some highlighting on the flight feathers to indicate where the stem of the feather is visible. A lot of tiny touches can be added to increase the realism of the wing, but don’t go too far as you can quickly over do it.
I hope you’ll get some paint and try your hand at painting a mallard duck wing now that you know the secret. Until next time, keep your brushes clean, your colors pure, and as always, thanks for stopping by the North Forty.
Thank you.


I make woodburned necklaces (painted with thin layer of acrylic paint) on tagua nuts, often with wildlife subjects. (I sell them at local craft shows for the most part.) I took a nice photo of a male mallard that would fit the vertical format but the bird had somewhat nonstandard (very pale) feather coloration. So I’m researching upper wing feather colors in for male mallards. I found your article on painting mallard underwings. If you have written the article on the upper wing I’d love to see it but I haven’t been able to find it.
Thank you,
Rita Ferrara
Thank you for taking the time to comment. I do plan to do an article on painting the top side of a mallard duck wing as soon as I can get the time and organize the photographs.
Thank you so much for posting this!!! I have a couple of questions, first when will the top of the wing instructions be out? and second what colors do you use for the Mallard hen? The hen is my downfall I can never seem to get my colors right for her. Please if you could let me know. I look forward to your next tip!!!!
Thanks for visiting our site! I will create an article with photographs for painting the hen as soon as I can get the time. In the meantime, here are some tips.
The colors that I use for the mallard hen is a mix of burnt umber, ultramarine blue, and titanium white. I mix these three colors to achieve a midtone color that has a gray-brown tint and apply this color over the entire bird, with the exception of the underside of the wing, the beak, and the feet. Then, using this midtone color as a base, I create a darker value and a lighter value of the same mix to create the shadows and highlights for the hen.
Thanks again for visiting and commenting.
thank you. I have been also looking to learn how to paint quail in flight. mainly the feathers. if you had a instruction pictorial like the mallard wing I’d love to see it