In order to create wildlife paintings with the realism that I desire, I can most accurately depict shadows in the scene using a technique that I refer to as shade mixing. Light and shadows create the shape of objects in the scene such as trees, rocks, and even the wildlife themselves. In this post, I will attempt to illustrate how I use a four-color technique to create the shadows that make any painting look lifelike.
In real life, shadows are formed when direct light falls on an object and is prevented from illuminating the entire surface of the object evenly because of it’s shape. To paint shadows correctly, you must have the ability to see the difference in the way the light falls on the object to be painted. The actual color of a tree is technically the same on the sunlit side as it is on the shaded side but the side of the tree that is in shade appears darker than the side on which the light actually falls.
If the shaded side of the tree was in total darkness, it would appear black. However, because diffused light is still striking the shaded area, it will have the same color characteristics as the lit side only in a darker tint. If we merely paint the tree darker in the shade than on the lit side, our tree will appear flat and lifeless. In order to give the shadows life, we want to paint as much detail on the shaded side as we do on the lit side. The only difference is the details on the shaded side will be darker than the details on the lit side.
Now let me explain how I go about creating this illusion. When I’m painting, I use 2 oz. portion cups into which I mix my colors. The cups are the little clear plastic cups that stores use to give out food samples to shoppers to entice the them to buy their products. The 2 oz. cups come in a box of 2000 cups for about $20.00 at Sams Club stores. I also purchase the lids that fit the cups for about $20.00. The lids prevents the paint from drying out and thus allows me to create an entire painting with a single mix of paint. I stopped using a painting palette years ago. One reason was because of the loss of paints from having it dry up on the palette. Another reason was because the palette was so hard to clean up after using it. The last reason was because I could never get the paint to flow well enough to suit my style of painting.
One tool I use to ensure that my paints have the same consistency each time I mix them is a set of digital food scales with a 6 lbs maximum weight limit. When mixing the paint for a tree, I start by placing the empty cup on the scales before turning on the power. This zeros the display and takes the weight of the cup out of the equation.
I start the mix by placing 0.4 oz of burnt sienna acrylic paint into the cup. I then add 0.2 oz of clean water to the cup using a dropper bottle. This creates a solution that is 1/3 water. With the Windsor and Newton Acrylic paints I use, this is a perfect recipe for mixing my tints. The paint is then thoroughly mixed to ensure that the paint is well blended with the water. I then do the same thing with ivory black and titanium white. This gives me my three primary working colors for all the trees in the painting. I can vary the mix for different trees in the scene.
I want to first create my darkest tree color by mixing ivory black with burnt sienna in a clean cup. This mix will vary from tree to tree and from painting to painting. The amount of black in the mix is determined by how dark I want the darkest part of the shadows. This color will be my darkest value for the tree.
Next I pour titanium white in a clean cup and mix in some of the dark value for the tree. When I get this color just right, this will be the lightest value for my tree. I then pour some of the dark tree value into two more clean cups. With the addition of different amounts of white, these two colors will be my two middle values. I start mixing titanium white into each of these two cups until I achieve two different midtone values.
When I’m finished, I will have four values of the tree color ranging from dark to light. The difference in the tint between each progressively lighter color is only enough to produce the desired contrast with its adjacent darker value.
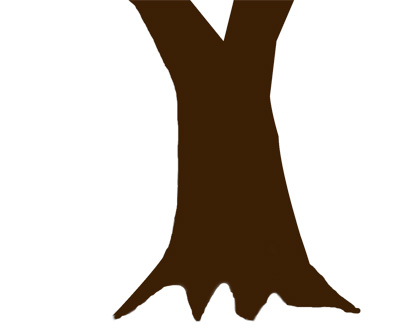
When the paints are mixed, I start the tree by painting the entire tree with the dark value, applying enough coats to completely cover the canvas. The reason I do this is because even the lit side of the tree has some dark shadows in the areas between the bark.
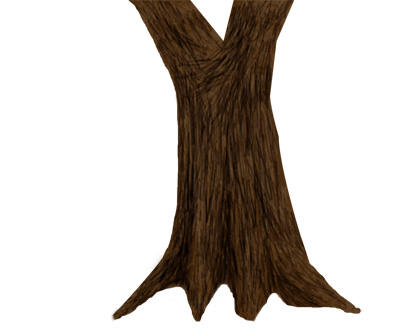
When this layer is dry, I start on the shaded side of the tree with the next lighter shade of tree color and paint in the details of the bark from the shaded side all the way through the lit side. In this step, I’m actually creating the shape of the bark on the tree. Again, even on the lit side of the tree, there are areas of shade so this color creates the contrast needed to really bring out the bark on the tree.
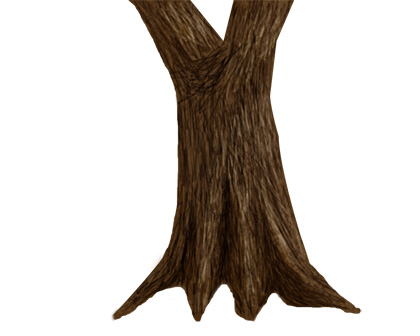
When those two layers are complete, I start at the breaking point of the shadow on the tree with the next lighter color and paint in details from there all the way through the lit area. The boundary between the lit side and the shaded side of the tree is determined by the angle that the light is hitting the tree, but is usually about the center of the tree.
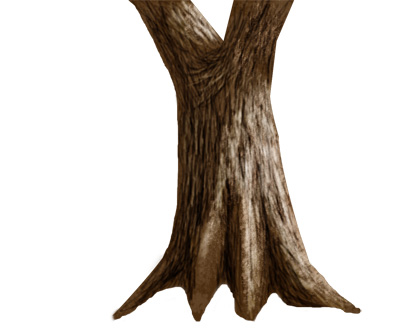
When this layer is dry, I start highlighting the bark on the lit side of the tree with the lightest value of the tree color. The closer I get to the fully lit part of the tree, the more of the surface of the bark is made up of the lightest value I apply to the bark of the tree.
With the technique of shading by painting from dark to light using the four shades of the original color, I can achieve vast amounts of detail in both the shaded area as well as the lit area of the tree. These same techniques are used on all objects in my scenes. The only difference is the color of the object and the amount and type of texture of the object.
I hope I have inspired you to take some paint and try your hand at creating shadows. Until next time, keep your brushes clean, your colors pure, and as always thanks for stopping by the North Forty.
Regards,

Thank you.


Amazing stuff.. I am going to want some time to think over this blog.
http://cardsdhc.com/ Thanks for that awesome posting. It saved MUCH time
scooby dooby doo!
http://burn20.com/products-page/Weight%20Loss/slim-xtreme-30-day-supply/ Thanks for that awesome posting. It saved MUCH time
Cheers, I really enjoy the way you wrote the sub… maybe u could look at my page and share some tipps. thank you in advance
Thanks for such informative and helpful article How to Create Shadows in a Wildlife Painting.